Showing posts with label Bags. Show all posts

Monday, June 23, 2014

Convertible Carryall !


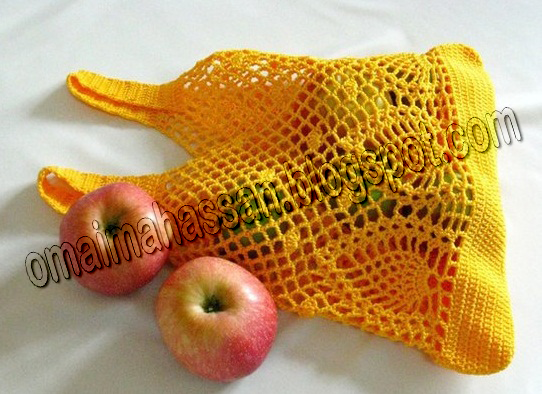
This versatile carryall can be used as a purse or a backpack. The straps are detachable so the bag can function as needed. The diagonal stripes on the front add visual interest.


FINISHED MEASUREMENTS

10 inches wide x 10 1/2 inches tall x 4 inches deep

MATERIALS

* Caron Simply Soft medium (worsted) weight acrylic yarn (6 oz/315 yds/170g per skein):

2 skeins #9759 ocean

1 skein each and #9717 orchid

* Size G/6/4mm crochet hook or size needed to obtain gauge

* Tapestry needle

* Sewing needle

* 1-inch button

* Sewing thread

* Key ring hooks: 2

*Pink lanyard hooks: 4

GAUGE

13 sts = 4 inches; 14 rows = 3 inches

PATTERN NOTES

Weave in loose ends as work progresses.

Join with slip stitch as indicated unless otherwise stated.

Chain-3 at beginning of round counts as first double crochet unless otherwise stated.

SPECIAL STITCH

Long sc (lsc): Working over ch-1 sp below, sc in sc on rnd directly below.

CARRYALL

FRONT POCKET

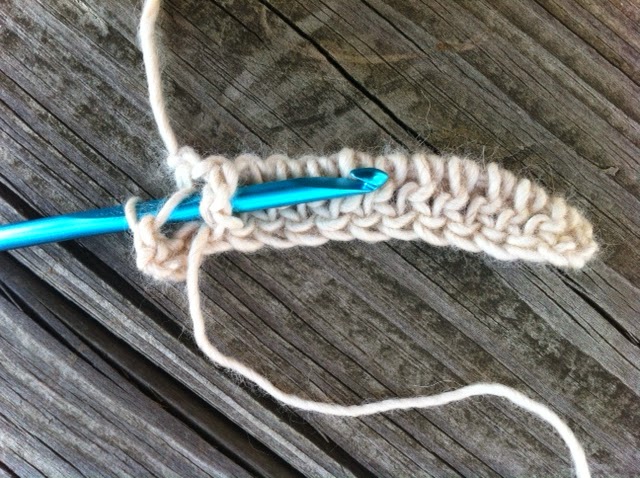
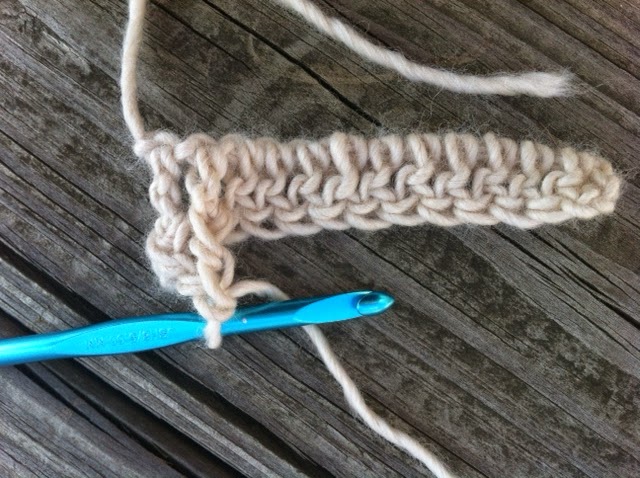
Row 1: Starting at corner and working diagonally with soft pink, ch 2, sc in 2nd ch from hook, turn. (1 sc)

Row 2: Ch 1, working in back lp (see Stitch Guide) 3 sc in next sc. Fasten off soft pink, turn. (3 sc)

Row 3: Join (see Pattern Notes) orchid in back lp of first sc, ch 1, working in back lp only, 2 sc in first sc, sc in next sc, 2 sc in last sc, turn. (5 sc)

Row 4: Ch 1, working in back lp only, 2 sc in first sc, sc in each sc across to last sc, 2 sc in last sc. Fasten off orchid, turn. (7 sc)

Note: Work Front Pocket maintaining the following color sequence: [2 rows soft pink, 2 rows orchid, 2 rows ocean, 2 rows soft pink, 2 rows orchid] rep color sequence.

Rows 5-13: Ch 1, working in back lp only, 2 sc in first sc, sc in each sc across to last sc, 2 sc in last sc, turn. (25 sc)

Row 14: Ch 1, working in back lps only, sk first sc, sc in each sc across to last sc, 2 sc in last sc, turn.

Row 15: Ch 1, working in back lps only, 2 sc in first sc, sc in each sc across to last 2 sc, sk next sc, sc in last sc, turn.

Rows 16-33: Continuing in established color pattern, [rep rows 14 and 15 alternately] 9 times.

Rows 34-43: Ch 1, working in back lps only, sk first sc, sc in each sc across to last 2 sc, sk next sc, sc in last sc, turn. (5 sc)

Row 44: Ch 1, working in back lps only, sk first sc, sc in next sc, sk next sc, sc in last sc, turn. (3 sc)

Row 45: Ch 1, working in back Ips only, sk first sc, sc dec (see Stitch Guide) in next 2 sc. (1 sc)

Rnd 46: Now working in rnds, working around outer edge of Pocket with soft pink, ch 1, work 15 sc across first short side, ch 2 (for corner), work 34 sc across first long side, ch 2 (for corner), work 15 sc across 2nd short side, ch 2 (for corner), work 34 sc across last side, ch 2 (for corner), join in first sc. Fasten off

Rnd 47: Join ocean in any sc, working around Front Pocket, ch 1, sc in each sc and (sc, ch 2, sc) in each corner ch-2 sp, join in beg sc. Fasten off.

CARRYALL BOTTOM

Row 1: With ocean, ch 10, sc in 2nd ch from hook, sc in each rem ch across, turn. (9 sc)

Row 2: Ch 1, 2 sc in first sc, sc in each of next 7 sc, 2 sc in last sc, turn. (11 sc)

Row 3: Ch 1, sc in each sc across, turn.

Row 4: Ch 1, 2 sc in first sc, sc in each of next 9 sc, 2 sc in last sc, turn. (13 sc)

Rows 5-36: Rep row 3.

Row 37: Ch 1, sc in first sc, sk next sc, sc in each of next 9 sc, sk next sc, sc in last sc, turn. (11 sc)

Row 38: Rep row 3.

Row 39: Ch 1, sc in first sc, sk next sc, sc in each of next 7 sc, sk next sc, sc in last sc, turn. (9 sc)

Row 40: Rep row 3.

Rnd 41: Now working in rnds, ch 1, work 40 sc across first long side in ends of rows, working on opposite side of foundation ch, sc in each of next 9 chs, sc in end of each of next 40 rows, sc in each of next 9 sc across row 40, join in beg sc. (98 sc)

Rnd 42: Holding Front Pocket with long side in front of first long side of rnd 41, insert hook in first ch-2 sp and front lp (see Stitch Guide) of next st on rnd 41 and sl st, working through sts on bottom of Front Pocket and front lp of rnd 41, sl st in each st across to ch-2 sp of Front Pocket, sl st in next ch-2 sp and front lp of next st on rnd 41, sl st in front lp of each rem sc around, join in beg sl st, do not fasten off.

CARRYALL BODY

Rnd 1: Ch 1, working in rem back lps of md 41, sc in each st around, join in beg sc, turn.

Rnd 2: Ch 1, sc in each sc around, join in beg sc, turn.

Rnd 3: Rep rnd 2.

Rnd 4: Ch 1, sc in first sc, ch 1, sk next sc, [sc in next sc, ch 1, sk next sc] around, join in beg sc, turn.

Rnd 5: Ch 1, [lsc (see Special Stitch) on rnd below, sc in next sc] around, join in beg sc, turn.

Rnds 6-41: [Rep rnds 2-5 consecutively] 9 times.

Rnds 42-44: Rep rnds 2-4.

Rnd 45: Ch 1, *sc in next ch-1 sp, [sc in next sc, sc in next ch-1 sp] 3 times, sk next sc, rep from * 10 times, sc in next ch-1 sp, [sc in next sc, sc in next ch-1 sp] 4 times, sk next sc, join in first sc, turn

Rnds 46 & 47: Rep rnd 2.

FIRST HANDLE TAB

Row 1: Now working in rows, ch 1, sc in each of next 8 sc, turn leaving rem sts unworked. (8 sc)

Row 2: Ch 1, sc in first sc, sk next sc, sc in each of next 4 sc, sk next sc, sc in last sc, turn. (6 sc)

Row 3: Ch 1, sc in each sc across, turn.

Row 4: Ch 1, sc in first sc, sk next sc, sc in each of next 2 sc, sk next sc, sc in last sc, turn. (4 sc)

Rows 5-9: Rep row 3.

Row 10: Ch 1, holding ring of key ring hook behind previous row and working through sts and ring at the same time, sc in each of next 4 sc, do not turn.

Rnd 11: Now working in rnds, sl st in end of each row down Tab, surface sl st across base of row 1 of Tab, sl st in end of each row up other side to row 10. Fasten off.

FLAP

Row 1: With inside of Carryall facing, join ocean with sc in inside front lp of next unworked sc of rnd 47 of Carryall Body, sc in next 34 sts, turn.

Row 2: Ch 1, sc in each sc across, turn.

Row 3: Ch 1, sc in first sc, ch 1, sk next sc, [sc in next sc, ch 1, sk next sc] across, turn.

Row 4: Ch 1, [lsc into sc on row below ch-1 sp, sc in next sc] across, turn.

Row 5: Rep row 2.

Row 6: Ch 1, sc in first sc, sk next sc, sc in each sc across until 2 sc rem, sk next sc, sc in last sc, turn.

Rows 7 & 8: Rep rows 3 and 4.

Rows 9 & 10: Rep row 6.

Rows 11-30: [Rep rows 7-10 consecutively] 5 times.

Rows 31 & 32: Rep rows 7 and 8.

Row 33: Ch 1, sc in first sc, [sk next sc, sc in next sc] across, turn.

Row 34: Rep row 2.(5 sc)

Rnd 35: Now working in rnds, ch 5, sl st in last sc, sl st in ends of rows back up to Carryall Body, sl st in first unused lps of next st on rnd 47 of Carryall, ch 2, sk next st, sl st in each unused lp on rnd 47 until 2 sts rem behind Flap, ch 2, sk next st, sl st in next st, sl st in each st down other side of Flap, sl st in each ch, sl st in first sl st. Fasten off.

2ND HANDLE TAB

Row 1: Join ocean with sc in next unworked st on rnd 47 of Carryall, ch 1, sc in each of next 8 sts, turn, leaving rem sts unworked. (8 sc)

Rows 2-10: Rep rows 2-10 of First Handle Tab.

Rnd 11: Rep rnd 11 of First Handle Tab.

PURSE STRAP

Row 1: With ocean, ch 4, sc in 2nd ch from hook, sc in each rem ch across, turn. (3 sc)

Rows 2-75: Ch 1, sc in each sc across, turn.

Row 76: Ch 1, sc in first sc, ch 2, sc in last sc.

Rnd 77: Now working in rnds, sl st in end of each row up first long side of Purse Strap, working in opposite side of foundation ch, sc in first st, ch 2, sc in last st, sl st in end of each row along 2nd long side of strap, sl st in first sc on row 75, sl st in next 2 chs, sl st in last sc, join in first sl st. Fasten off.

BACKPACK STRAP

Make 2.

Row 1: With ocean, ch 4, sc in 2nd ch from hook, sc in each rem ch across, turn. (3 sc)

Rows 2-111: Ch 1, sc in each sc across, turn.

Row 112: Ch 1, sc in first sc, ch 2, sc in last sc.

Row 113: Now working in rnds, sl st in end of each row up first long side of Backpack Strap, working in opposite side of foundation ch, sc in first st, ch 1, sc in last st, sl st in end of each row along 2nd long side of Backpack Strap, sl st in first sc on row 112, sl st in next 2 chs, sl st in last sc, join in first sl st, fasten off.

ASSEMBLY

Sew sides of Front Pocket to Carryall. For purse, attach Purse Strap by inserting key ring hooks into ch-2 sp at each end of Purse Strap. Sew button to front of Carryall so placement corresponds with ch-sp on Flap when Carryall is closed. For backpack, attach lanyard hooks in each ch-1 sp at ends of Backpack Straps. Hook 1 end of each strap to ch-sp at back of Flap. Hook other end of each Strap in st at bottom of Carryall, adjusting placement as desired.


♥ ♥ ♥

Friday, May 9, 2014

beautiful crochet raffia bag !

Crochet raffia bags are the latest fashion trend seasons. Designers offer a very interesting solution , which appear as a result of a truly beautiful crocheted bags. Very unpretentious model , which is not even worth paint scheme - so everything is clear and easy to read in the photo. Easy to repeat , which is very pleasing
   Extremely interesting design method to create a form bags. As you can see on the pictures , the bag is connected simple rectangular shape , the bulk of the circle fit and stylish trapezoid shaped bag can be given on request by using buttons that are sewn on the sides. Raffia looks very stylish and unusual even in simple knitting pattern . Repeating pattern of columns not only simplifies the model , but , on the contrary , makes it emphatically stylish . As you can see from the pictures , Prada offered a fairly wide range of color and texture interpretations , offering really interesting ideas for knitted bags.


 It's just me trying to find some diagrams which help us to make it,
this is all i have ,, so i hope you get Benefit :)


  ♥ ♥ ♥

Tuesday, May 6, 2014

the string bag !

from nylon cord, hook 2.5. It took 110 grams.
Despite its small size, it's very roomy! In my opinion, it's stylish and practical alternative to plastic bags!


Friday, April 18, 2014

Elegant Bag !

Handmade crochet bag in many colors - the favorite modern style knit bag.
At first glance the fabric looks complicated, but it’s really very easy to create,,the upper part made from a few rows of half single crochet , And the rest of the bag are from basket weave stitch
Here’s an example of the basket weave stitch pattern , Photos of the steps and diagram which is  used for making it
It's big enough to carry all essentials,
This unique bag  has a very practical cotton lining with a pocket for your bits and pieces. The plaited handle is very comfortable and smoothly, The
Border is decorated with colorful beads.


 the Dimensions:
 14.5 "x 3.5" x 13.75 "
Drop Length: Drop (distance from shoulder or handle to top of bag): 10 "

Abbreviations

ch: chain

dc: double crochet


fpdc: front post double crochet – yo, place hook around the front of the post of the st you are working, yo and pull up loop, yo, pull through 2 loops, yo, pull through 2 loops.

bpdc: back post double crochet – yo, place hook around the back of the post st you are working, yo and pull up a loop, yo, pull through 2 loops, yo, pull through 2 loops.

If these and other crochet abbreviations look like a foreign language to you, check out our handy crochet abbreviation guide here.


Row 1: Dc in the 4th chain from hook, dc in all chain sts across. When you get to the end of your row, ch 2 and turn.

Row 2: Skip the first dc, *fpdc in next 3 sts, bpdc in next 3 sts; repeat from * to the end of your row, dc in top chain of turning chain from the row below, ch 2, turn.


Row 3: Repeat Row 2.

Row 4: Skip first dc, *3 bpdc, 3 fpdc; repeat from * to end, dc in top ch of turning ch from row below, ch 2, turn.

Row 5: Repeat row 4.

Work Rows 2-5 until your fabric is the desired length.


Saturday, April 12, 2014

Unusual and Very Rich Bag !


Raffia is quite flexible and durable material , which ensures the formation of elastic enough hard surface , which is essential when creating handbags, and at the same time opens up wide opportunities for creativity. Bags made of this material looks really unusual and very rich.

 
The original size of this bag : height - 28 cm, length - 35.5 cm, depth - 7.5 cm, height strap - 6 cm Finishing and handles made ​​of genuine leather , inside one compartment has a secret pocket, locked bag button . 

CLICK  Here  to download MORE DESCRIPTION


Thursday, April 10, 2014

colorful granny square bag !

Hand crocheted with colorful flowers and granny square design, this mini shoulder bag has an eye-catching look that adds style to any casual outfit. This soft, luxurious-looking bag features rich floral pattern and classic design, Loved it & love to share it with you


Tuesday, March 18, 2014

Funky Bag !

This stylish purse is perfect for everyday use.

FINISHED MEASUREMENTS
22 inches wide at base x 9 inches high, excluding Handle
MATERIALS
• Omega Pinky fine (sport) weight nylon yarn (2 oz/98 yds per skein): 4 skeins #16 copper
• Size F/5/3.75mm crochet hook or size needed to obtain gauge
• Tapestry needle
• Liquid seam sealant
• Lining fabric (optional)
• Zipper to fit opening (optional)
GAUGE
7 sts = 11/2 inches; 7 dc rows = 3 inches
PATTERN NOTES
Weave in loose ends as work progresses.
Dabbing liquid seam sealant on ends is necessary when using nylon yarn because it unravels easily. When coming to an end, work over the yarn like normal, but leave a little longer tail when fastening off. When you're ready, clip the tail close to the stitches and immediately dab liquid seam sealant on the end and the surrounding area on the inside of your work. It can darken the yarn, so dab lightly, but make sure it's saturated.
Bag is worked in back loops only unless otherwise stated.
Chain-2 at beginning of row does not count as first double crochet.
Join with slip stitch as indicated unless otherwise stated.
BAG
BODY
Row 1: Leaving long length at beg for sewing side seam, ch 60, sk 2 chs (2 sk chs do not count as a st), dc in each rem ch across, turn. (58 dc)
Rows 2-51: Working in back lps (see Stitch Guide and Pattern Notes), ch 2 (see Pattern Notes), dc in each dc across, turn. (58 dc)
At the end of row 51, leaving long lengths for sewing side seam, fasten off.
Fold bag in half long ways, whipstitch (see illustration) tog both sides, working in every other st to shorten sides. With 5 sts rem, whipstitch all 5 ends tog as to gather to form bottom corner of bag. Fasten off.
TOP BAND
Rnd 1: Now working in mds, join (see Pattern Notes) to top on either side, ch 1, [(sc at end of next row) twice, sc dec (see Stitch Guide) over next 2 rows] around, do notjoin.
Rnd 2-7: Sc in each sc around.
Rnd 8: [Ch 1, sl st in next sc] around, sl st in beg ch 1. Fasten off.
HANDLE
Row 1: Leaving length at beg for sewing, ch 120, sc in 2nd ch from hook, sc in each rem ch across, turn. (119 sc)
Rows 2-4: Ch 1, sc in each sc across, turn.
Rnd 5: Now working in rnds, [sl st in next sc, ch 1] around sides of Handle, working 2 sl sts at each end, leaving a long length, fasten off.
 Fold over each end of Handle 11/2 inches and sew 1 end to each side of Bag.
OPTIONAL FINISHING
Place Bag on 2 layers of fabric. Trace a line around the Bag, adding 1/2 inch for seam allowances.
Cut out lining, sew sides and bottom. Fold top edge to WS. Place inside Bag and tack top edge of lining to top edge of Bag.
Sew zipper to inner edge of rnd 7 of Top Band.


Friday, March 14, 2014

Polly Bag


No, we're not talking about the plastic overwrap on a magazine, but a chic fashion bag that's trendy enough to use as a stylish purse and large enough to carry as a versatile tote.
FINISHED SIZE: 4x11 x 131/2 inches
MATERIALS: Omega La Espiga #9 fine (sport) weight nylon yarn (7 oz/339 yds/100g per roll): 3 rolls #80 turquoise
Sizes C/2/2.75mm and D/3/3.25mm crochet hooks or size needed to obtain gauge
Tapestry needle
11/2-inch heavy silver jump rings: 4
Hardboard base
Hook & loop closure strips (optional)
GAUGE: Gauge is not important for this project.
BAG
Bottom
Row 1: With size D hook, ch 47, sc in 2nd ch from hook and in each ch across, turn. (46 sc)
Rows 2-13: Ch 1, sc in each st across, turn. Using Bottom for pattern, cut hardboard base Vs inch smaller on all edges.
Sides
Rnd 14: Now working in rnds and in sts, ends of rows and in starting ch on opposite side of row 1, ch 1, evenly sp sc around, do not join rnds. Mark first st of rnd.
Rnd 15: Dc in first stand in each st around.
Rnd 16: [Fpdc (see Stitch Guide) around next st, bpdc (see Stitch Guide) around next st] around.
Rnds 17-32: Bpdc around each fpdc and fpdc around each bpdc around. At end of rnd 32, hdc in first st.
Rnds 33-61: Working in back lps (see Stitch Guide), sc in each st around. Rnd 62: [Ch 1, si st in next st] around. Fasten off. Insert hardboard base in bottom of Bag.
Handle
Make 2.
Row 1 (RS): With size D hook, leaving long end, ch 145, working in back bar of ch (see illustration), sc back bar of 2nd ch from hook and in back bar of each ch across, turn. (144 sc)
Rows 2-7: Ch 1, sc in each st across, turn.
Fold piece in half lengthwise with WS tog, si st first and 7th row tog. Leaving long end, fasten off.
Finishing
Using long ends, whipstitch ends of Handle to jump rings.
Whipstitch rings to row 34 of Bag as shown in photo. Tie With size C hook, ch 225, si st in 2nd ch from hook and in each ch across. Fasten off.
Beg in center front of 1 Side, weave Tie in and out between sts of row 32, which is the last row before sc.
 
crochet kingdom (E.H) Blogger Template by Ipietoon Blogger Template